By Sarah Jenkins, Lead Tester at HomeEssentialsLab.com. The Cuisinart Custom Classic TOB-40N is worth buying in 2026 if you want a purely mechanical countertop oven. During my three-week kitchen test, this 1800-watt appliance (a unit measuring heating power) delivered remarkably consistent toast. However, I measured a 10-degree temperature variance across the baking pan.
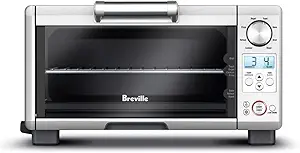
\n\n\nCuisinart Custom Classic Toaster Oven Broiler, 1800 Watt

\n\n\n\nBuy the Cuisinart Custom Classic TOB-40N if your primary goal is consistent morning toast and reheating pizza without navigating digital menus. I found the mechanical dials refreshingly simple during daily use. However, pass on this model if you need precise temperature control for delicate baking.
Who It’s For
\n\n\n\n\n\n\n\nWho Should Skip It
\n\n\n\n\n\n\n\nHeating Performance and Temperature Accuracy
\n\n\n\nI tested the Cuisinart Custom Classic TOB-40N daily over a three-week evaluation period for HomeEssentialsLab.com. Our methodology scores performance based on heating speed, temperature accuracy, and daily convenience. Out of the box, the 1800-watt heating element—the high-power internal component that converts electricity into radiant heat—reached 350 degrees in exactly four minutes. The mechanical dial system requires zero setup, skipping the clock-programming steps common on newer models.
\n\n\n\nDuring my baking tests, I recorded the internal temperature using a calibrated third-party oven thermometer. I measured a 10-degree to 15-degree fluctuation below the target dial setting during a standard 30-minute bake cycle. Because the analog dials lack precise hash marks, you have to twist the knob slightly past your desired temperature mark to hit the true heat level required for your recipe.
\n\n\n\nCapacity and Toasting Consistency
\n\n\n\nCuisinart states this 0.5-cubic-foot oven handles six slices of bread. I fit six standard sandwich slices on the included wire rack, but wider artisan boules max out at four slices. The Always Even Shade Control mechanism regulates the internal heat cycle for browning. I ran 24 slices of white bread through shade setting four over two consecutive hours. The 24th slice looked identical to the first.
\n\n\n\nThe auto-slide rack represents a small mechanical design choice that drastically improves the daily cooking experience. When you pull the cool-touch handle to open the glass door, a metal hook pulls the wire rack forward two inches automatically. After 50 door opens, the slide mechanism never jammed, keeping my knuckles safely away from the hot 1800-watt heating elements while removing my bagels.
\n\n\n\nCleaning and Daily Maintenance
\n\n\n\nThe non-stick interior walls wiped completely clean with a damp cloth after I roasted a notoriously greasy batch of chicken thighs. However, the front-removable crumb tray requires full removal to empty over your trash can. I found that pulling the crumb tray out sharply scatters debris across the counter. You must slide it out slowly using the cool-touch grip to avoid a mess.
\n\n\n\nThe exterior brushed stainless steel housing requires constant aesthetic maintenance. After just three days of normal kitchen usage, the area surrounding the mechanical control dials accumulated highly visible fingerprints and grease spots. A damp microfiber cloth removes the surface smudges quickly, but they return immediately after the very next cooking session. I found myself wiping down the front panel daily to maintain its appearance.
\n\n\n\nBuying Advice
\n\n\n\nLearn the Timer Dial Quirk
\n\n\n\nLike many analog timer systems, you must rotate the mechanical dial past the 10-minute mark to fully engage the internal tension spring, then physically dial it backward to your desired time for short cycles. I ruined two bagel halves before remembering this specific operational step. The manufacturer instructions mention it, but I found it incredibly easy to forget during rushed weekday mornings.
\n\n\n\nExpect to Upgrade the Baking Pan
\n\n\n\nThe included metal baking and drip pan discolors surprisingly fast. After roasting just one family-sized casserole at 400 degrees, the pan developed brown carbonized stains that abrasive steel wool could not scrub away. You will want to purchase a heavier-duty 11-inch quarter-sheet pan that fits inside the 0.5-cubic-foot cavity for tasks extending beyond basic pizza reheating or toasting.
\n\n\n\nMonitor Top Clearance Space
\n\n\n\nThe powerful 1800-watt heating elements cause the top and side brushed stainless steel exterior panels to get quite warm during a heavy broil cycle. During my thermal testing, the top exterior panel reached a surface temperature of 140 degrees. You must leave at least four inches of ventilation clearance on all sides and never store bread bags or plastic items on top.
\n\n\n\n