A properly emptied Shark vacuum is the absolute baseline for peak suction power and motor longevity. Most users mistake a clogged dust cup for a broken machine, but restricting airflow simply forces the motor to overwork. Learning the exact method to clear your canister will instantly restore your vacuum’s performance and save you money on unnecessary replacements.
This guide provides the definitive steps to clear out your dust cup safely and effectively. You will learn how to remove trapped debris without creating a dust cloud in your living room, alongside the correct way to check your filters during the process. Follow these exact instructions to eliminate clogs and maximize your cleaning routine.
Preparing Your Workspace
You should always empty your vacuum in a well-ventilated area to avoid breathing in stray particles. Taking the dust cup outside to a large trash can is usually the best approach. If you must do it indoors, hold the canister deep inside a tall garbage bag. This prevents the fine dust from floating right back onto the floors you just cleaned. Wearing a basic dust mask can also help if you have severe allergies.
Make sure the vacuum is completely turned off and unplugged from the wall before you start. You do not want the machine turning on accidentally while your hands are near the moving parts. Gather a damp paper towel and a soft brush to help dislodge stubborn dirt. Having these tools ready makes the whole process much faster. A little preparation goes a long way in keeping your home clean.
Removing the Dust Cup
Most models feature a simple release latch located near the top of the canister handle. Press this button firmly while pulling the dust cup away from the main body of the vacuum. The canister should detach easily without requiring any forceful yanking or twisting. If it feels stuck, check for any visible debris blocking the connection points. Gently wiggle the cup side to side until it pops free from the base.
Hold the detached canister upright as you carry it to your trash bin. Tilting it too early might cause loose dirt to spill out of the top intake valve. The Shark vacuum features Anti-Allergen Complete Seal Technology that traps dust inside the machine. You want to maintain that seal by keeping the connection points completely free of grit. Wipe away any dust buildup around the base with your damp paper towel before reattaching the cup.
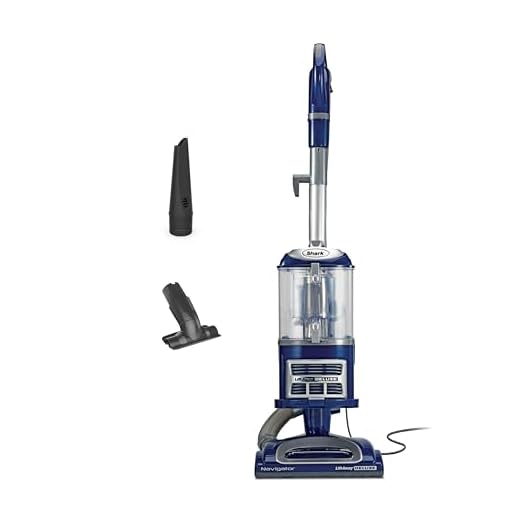
Shark Navigator Lift-Away Deluxe NV360
Emptying the Debris
Position the dust cup low inside your trash receptacle to minimize the dust cloud. Locate the bottom release button and press it to swing the lower door open. The majority of the dirt and pet hair will fall out immediately. Give the side of the canister a few gentle taps to shake loose any clinging particles. Do not bang the plastic cup hard against the trash can because it might crack.
Sometimes long hair and carpet fibers get wrapped around the internal metal screen. You can use a soft brush or your fingers to pull this debris away from the center cone. Never use sharp objects like knives or scissors inside the dust cup. Scratching the plastic can create rough spots where dirt will easily get stuck in the future. Close the bottom door firmly until you hear a loud click.
Checking the Filters
Emptying the dust cup is the ideal moment to inspect your pre-motor filters. These foam and felt pads sit directly underneath the canister on most upright models. Pull them out and tap them gently against the inside of your trash can to remove loose dirt. If they look heavily soiled, you will need to wash them with plain water. Let them air dry completely for at least a full day before putting them back.
You should also check the post-motor HEPA filter located behind the front grill. This component is responsible for catching the microscopic particles that escape the main dust cup. Tap it clean just like the foam filters but avoid getting it wet unless the manual specifically says it is washable. A clogged HEPA filter will drastically reduce your suction power over time. Replace this filter entirely once a year to keep the motor running cool.
Reassembling the Vacuum
Once the dust cup is completely empty and the filters are clean, it is time to put everything back together. Seat the bottom of the canister onto the lower base of the vacuum first. Tilt the top of the cup forward until it clicks securely into the upper latch. Give the handle a gentle tug to confirm it is locked in place. A loose dust cup will leak air and ruin your cleaning performance.
Turn the vacuum on and listen to the motor for a few seconds. It should sound smooth and consistent without any high-pitched whining noises. Test the suction by placing your hand briefly over the end of the hose. You should feel a strong pull immediately if everything is sealed correctly. Your machine is now ready to tackle the next big cleaning job around the house.
Final Thoughts
Emptying your vacuum correctly prevents clogs and protects the motor. Go check your dust cup right now, empty it into an outdoor trash bin, and inspect your pre-motor filters before your next cleaning session.
Frequently Asked Questions
How often should I empty my vacuum dust cup?
You should empty the dust cup after every single use for the best results. Waiting until the dirt reaches the maximum fill line can restrict airflow and reduce suction power.
Can I wash the plastic dust cup with water?
Yes, you can rinse the plastic dust cup with warm water and mild soap. You must ensure it is completely dry before reattaching it to the vacuum to prevent mold growth.
Why is my vacuum still losing suction after I empty it?
A loss of suction usually points to dirty filters or a clog in the hose. Check the foam pre-motor filters and inspect the brush roll for tangled hair.