Making a morning smoothie is a great habit until you notice a lingering garlic or protein powder smell in your blender pitcher. Those trapped odors can ruin the taste of your next drink and make you want to throw the whole appliance away. Learning How to Eliminate Blender Odors: A Step-by-Step Guide will save your equipment and keep your beverages tasting fresh. The process takes only a few minutes of active work and uses basic supplies you probably already own. You will learn exactly where smells hide and how to banish them for good.
Most people just run soapy water through their blender and assume it is clean. That quick spin cycle misses the tiny crevices around the blades and the rubber seals where bacteria love to grow. We will walk you through a deep cleaning routine that targets those stubborn problem areas. Following these steps regularly prevents new smells from forming and extends the life of your blender parts. Grab your cleaning supplies and get ready to restore your pitcher to its original fresh state.
Step 1: Scrub the Hard to Reach Areas
The first step in removing bad smells is getting rid of the physical residue stuck under the blades and inside the lid. A standard sponge cannot reach these tight spots safely without risking a cut to your fingers. You need specialized tools like the OXO Good Grips Water Bottle Cleaning Set to do the job right. The detail cleaner in this set is ideal for getting into crevices in caps and cleaning screw threads where a large brush cannot fit. Using the right brush ensures you remove the hidden food particles that cause those terrible smells.
Start by filling the pitcher halfway with warm water and a few drops of dish soap. Use a long brush with short and firm bristles on the tip to thoroughly clean the bottom of the blender. The soft side bristles will clean the walls without scratching the plastic or glass. If your blender has a reusable straw or a narrow opening, a long straw brush is great for getting inside those tight spaces. Rinse everything with hot water once you finish scrubbing to wash away the loosened debris.
OXO Good Grips Water Bottle Cleaning Set

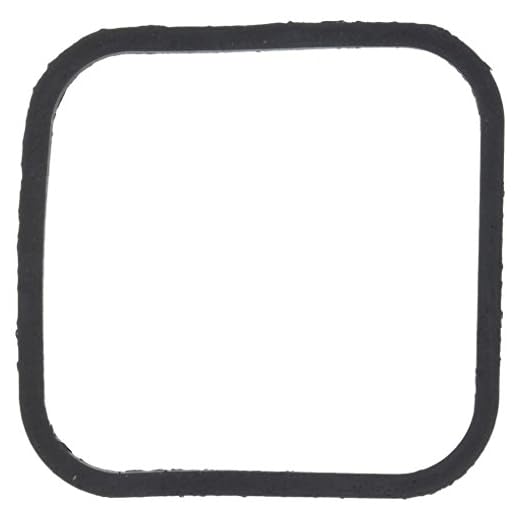
Step 2: Check and Replace the Gasket Seal
Sometimes the smell is not coming from the pitcher itself but from the rubber ring that seals the base. This gasket absorbs liquids over time and can trap mold or old food particles if it is not removed during routine cleaning. You should carefully pry the rubber seal out of the base assembly using a dull butter knife. Wash it thoroughly with hot soapy water and inspect it for any cracks or permanent discoloration. If the rubber feels stiff or the smell remains after washing, you need to throw it away.
Buying a new aftermarket blender gasket seal is a cheap way to fix a smelly appliance. If you own an older model, a Replacement for Vitamix Gasket Seal Fits Action Dome 3600 is a perfect example of a high quality and food grade material replacement. You just need to make sure you buy the exact item that matches your specific blender model. Press the new seal firmly into the groove so it sits flat and creates a watertight barrier. This simple swap often cures the worst odor problems instantly.
Vitamix Gasket Seal Replacement
Step 3: Neutralize Smells with a Baking Soda Soak
Even after a thorough scrubbing and a gasket check, some strong odors like onion or fish might linger in the plastic. This happens because plastic is slightly porous and absorbs the oils from pungent ingredients. You can pull those smells out by creating a strong alkaline soaking solution. Earthborn Elements Baking Soda is great for this task because it naturally absorbs and neutralizes stubborn odors. Buying a large one gallon bucket ensures you always have enough on hand for heavy duty cleaning projects.
Add half a cup of baking soda to your empty blender pitcher. Fill the container to the top with warm water and stir the mixture gently until the powder dissolves completely. Leave the pitcher on your counter to soak for at least four hours or overnight for the best results. Dump the cloudy water down the drain the next morning and wash the pitcher normally with dish soap. The plastic will smell completely neutral and look noticeably brighter.
Earthborn Elements Baking Soda

Step 4: Air Dry Completely
The final step in keeping your blender fresh is making sure it dries properly before you put it away. Storing a damp pitcher with the lid tightly closed creates a humid environment that encourages mildew growth. You should always disassemble the blender completely after washing it to let air circulate around every single part. Place the pitcher upside down on a clean dish rack or a dry towel. Leave the lid and the blade assembly spread out next to it so they can drip dry.
Wait until every drop of moisture has evaporated before you reassemble the appliance. This drying process usually takes a few hours depending on the humidity in your kitchen. If you are in a hurry, you can wipe the parts down with a clean microfiber cloth to speed things up. Never store the blender with the lid sealed shut in a dark cabinet. Leaving the lid slightly cracked open allows the inside to breathe and prevents stale air from building up.
Final Thoughts
Keeping your blending equipment smelling fresh requires just a little extra attention during your cleanup routine. Scrubbing the hidden crevices and replacing worn out rubber seals will stop bad smells at the source. A simple baking soda soak handles the rest of the stubborn odors trapped in the plastic. Enjoy your morning smoothies again without any unwanted garlic or protein powder flavors ruining the experience.
Frequently Asked Questions
Can I use bleach to clean my smelly blender?
You should avoid using bleach on food contact surfaces like blender pitchers. Bleach can degrade the rubber gaskets and leave a toxic residue if it is not rinsed perfectly.
How often should I deep clean my blender?
You should perform a deep clean with baking soda at least once a month. If you blend pungent ingredients like garlic or onions frequently, you might need to do this every two weeks.
Why does my blender smell like burning rubber?
A burning rubber smell usually indicates an issue with the motor or the blade assembly bearings. You should stop using the appliance immediately and check if the base is overheating during operation.


