Have you ever wondered why the ice at your favorite cocktail bar looks like a perfect glass cube while your home ice looks like a cloudy mess? The secret is not magic or expensive commercial machines. You can learn how to make clear ice at home easily with just a few simple tools. Cloudy ice melts faster and dilutes your carefully crafted drinks. Clear ice keeps your beverages cold longer without watering them down.
The cloudiness in standard ice cubes comes from trapped air bubbles and impurities freezing in the center. When water freezes from all sides at once, those impurities have nowhere to go. We will show you a technique called directional freezing that forces water to freeze from the top down. This pushes all the air and minerals to the bottom of the container. By the end of this guide, you will know exactly how to improve your home bartending setup.
Understanding Directional Freezing
Directional freezing is the core concept behind making crystal clear ice. In nature, lakes and ponds freeze from the top down because the cold air hits the surface first. The water below insulates the rest of the lake. This natural process pushes dissolved gases and minerals downward into the unfrozen water. The resulting top layer of ice is completely transparent and solid.
Standard plastic ice trays do the exact opposite of this natural process. Your home freezer blasts cold air at the tray from every possible angle. The water freezes on the outside first and traps all the air bubbles in the middle. To fix this problem, you need to insulate the sides and bottom of your water container. This forces the cold air to only freeze the water from the exposed top surface.
The Cooler Method
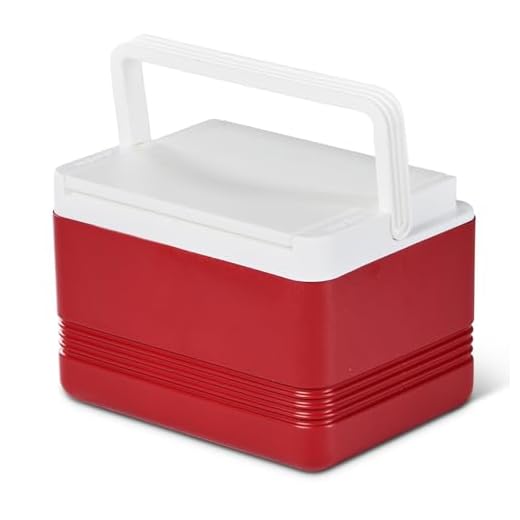
The most popular DIY approach requires a small insulated container like the Igloo Legend 6-Can Cooler. This five-quart cooler is made in the USA and features Ultratherm insulation that keeps the cold out of the sides and bottom. You simply remove the lid or leave it open so the cold air only hits the top of the water. Fill the cooler with regular tap water and place it directly into your freezer. The integrated bale handle folds flat for storage so it fits nicely on most freezer shelves.
You will need to leave the cooler in your freezer for about twenty-four hours. The goal is to freeze the top two-thirds of the water while leaving the bottom third liquid. Pull the cooler out and turn it upside down in your sink to release the block. The easy-clean liner resists stains and odors so your ice will taste perfectly fresh. You can then use a serrated knife and a mallet to carefully score and chop the block into large cubes.
Igloo Legend 5-Quart Cooler
The Dedicated Clear Ice Tray Method
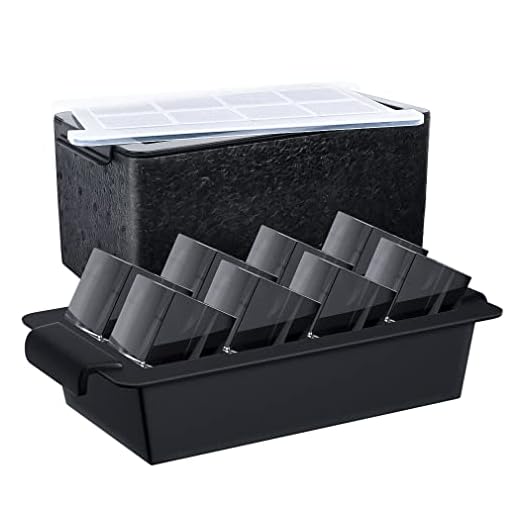
If chopping a giant block of ice sounds like too much work, you can buy a specialized mold. The TINANA Upgrade 2 Inch Clear Ice Cube Tray takes the directional freezing concept and shrinks it down. It uses an insulated outer box with a silicone mold suspended inside. You fill the entire unit with water and place it in your freezer for roughly thirty hours. The cold air freezes the water in the silicone molds first and pushes the impurities into the reservoir below.
This method produces eight large square crystal clear ice cubes with almost zero manual labor. You do not need to worry about timing the freeze perfectly or handling sharp tools. Once the freezing process is complete, you just pull the silicone mold out of the insulated base. Peel back the flexible silicone to reveal perfectly shaped two-inch cubes. These large cubes are the ideal size for a standard rocks glass and will melt incredibly slowly.
TINANA Clear Ice Cube Tray
Storing and Serving Your Clear Ice
Once you have your perfect clear cubes, you need to store them properly to maintain their clarity. Do not leave them exposed in the freezer because they will absorb food odors and slowly shrink through sublimation. Place your finished cubes into a heavy-duty zip-top freezer bag or an airtight plastic container. Squeeze out as much air as possible before sealing the bag. This protects the ice and keeps it ready for your next cocktail hour.
When you are ready to serve a drink, you must temper the ice first. Pull a cube from the freezer and let it sit at room temperature for about two minutes. You will hear it crackle slightly and see the surface become wet and glossy. If you pour room-temperature liquid over a freezing cold cube immediately, the thermal shock will crack the ice down the middle. Tempering ensures your beautiful clear ice stays perfectly intact in the glass.
Final Thoughts
Learning how to make clear ice at home easily will completely change your cocktail experience. You can choose the hands-on cooler method or opt for a convenient insulated silicone mold. Both techniques rely on the simple science of directional freezing to remove trapped air. Your drinks will look professional and taste better from the first sip to the last.
Frequently Asked Questions
Does boiling water make clear ice?
Boiling water before freezing does not create clear ice on its own. It removes some dissolved gases but does not prevent the outside-in freezing process that traps remaining impurities. You still need to use directional freezing to get truly transparent results.
Why is my clear ice cloudy at the bottom?
If the bottom of your ice is cloudy, you left the container in the freezer for too long. The impurities were pushed to the bottom but eventually froze when the water completely solidified. Try pulling your container out a few hours earlier next time.
Can I use tap water for clear ice?
Yes, you can use standard tap water when using the directional freezing method. The process naturally pushes the minerals and chlorine into the unfrozen water at the bottom. Using filtered water might yield slightly better results if your tap water is extremely hard.


