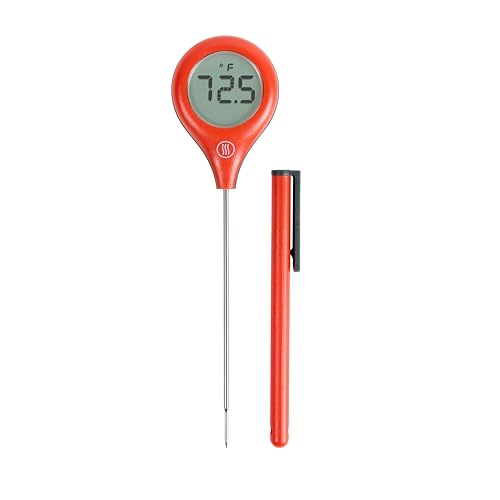
You pull a five-pound pork shoulder out of the oven after four hours. The outside looks beautiful and crusty. You carve into it at the dinner table and the center is entirely raw. Guessing the doneness of a large cut of meat wastes your money and ruins your dinner plans. A probe thermometer completely eliminates this guesswork.
These devices feature a metal spike attached to a heat-resistant cable. The spike stays inside the meat while the digital display sits on your counter. You set your target temperature to 145 degrees Fahrenheit for pork or 165 degrees for poultry. The alarm beeps the exact second your food finishes cooking. You get perfectly cooked meals every single time.
Using one properly takes a bit of technical know-how. Placing the tip just half an inch off-center will give you a false reading and a dry turkey. You need to know exactly where to insert the metal spike and how to route the cable out of your oven safely.
Finding the Coldest Part of the Meat
The tip of the probe must sit in the absolute center of the thickest part of your protein. This spot takes the longest to cook and represents the true internal temperature. Grab your whole chicken or beef roast and look for the widest section. Avoid resting the tip against a bone or a pocket of fat. Bone conducts heat faster than muscle and fat insulates. Touching either one gives you a highly inaccurate reading and ruins your dinner.
Insert the metal spike through the side of the meat rather than straight down from the top. Sliding it horizontally gives the sensor more contact with the center mass. If you cook a thin steak or a flat chicken breast, pick it up with tongs and slide the tip through the side profile. You want at least two inches of the metal shaft buried firmly in the food for a stable measurement.
Routing the Heat-Resistant Cable Safely
The braided metal cable connects the cooking probe to the base station. This wire handles temperatures up to 700 degrees Fahrenheit inside the oven cavity. The weak point is exactly where the wire meets the metal probe. Exposing that specific joint to an open flame or a broiler element will melt the internal sensors and destroy the device completely. Keep the transition point shielded by the bulk of the meat whenever possible.
Run the cord out of the oven door right near the hinges. The silicone seal around your oven door is flexible enough to close over the wire without crushing it. Avoid pinching the cable directly in the metal latch mechanism. Leave a little slack inside the oven so you can pull the roasting pan out to baste the meat. This prevents you from yanking the base station off your counter onto the floor.

Setting Target Temperatures and Alarms
Most digital base stations let you input a custom alert temperature. You want to set this alarm about five to ten degrees lower than your final desired doneness. Meat experiences carryover cooking after you take it out of the heat. A large ribeye roast pulled at 125 degrees will easily rise to a perfect medium-rare 135 degrees while it rests on your wooden cutting board. Anticipating this temperature spike saves your expensive steak.
Keep your display unit away from direct heat sources on the counter. The plastic housing will melt rapidly if you set it on a hot burner or too close to the oven vent. Many modern models feature magnetic backs. Stick the display straight onto the front of your oven door or the side of your refrigerator. This simple placement keeps your countertop clear and puts the flashing numbers right at eye level.
Managing Carryover Cooking and Resting
Leave the probe inside the meat while it rests on your cutting board. Pulling the metal spike out immediately creates an open hole for hot juices to escape. Watching the temperature display during the rest period teaches you exactly how your specific oven and cuts of meat behave. You will watch the numbers climb steadily for about ten minutes before they finally plateau and begin to fall back down.
Tent the meat loosely with aluminum foil during this resting phase. Wrapping the protein tightly traps steam and ruins the crispy skin you just spent two hours building. Wait until the numbers on your digital display start dropping before you finally remove the metal spike and carve. A ten-pound turkey needs a solid thirty minutes of resting time on the counter to lock in moisture properly before you serve it.
Testing the Probe for Accuracy
Digital sensors drift out of calibration naturally over time. A probe reading ten degrees too high will result in dangerously undercooked chicken. You can test your equipment in five minutes using a simple glass of ice water. Fill a tall glass with crushed ice and add cold tap water to the very top. Stir the thick mixture vigorously for thirty seconds to balance the temperature throughout the glass.
Submerge the tip of your probe two inches deep into the ice water. Keep the metal tip suspended entirely in the middle of the glass without touching the sides or the bottom. The digital display should settle at exactly 32 degrees Fahrenheit within fifteen seconds. Replace the unit or adjust the calibration settings according to your manual if the reading is off by more than two degrees in either direction.
Cleaning and Storing Your Thermometer
Water easily destroys the internal wiring of most standard oven thermometers. You must never submerge the braided cable or the probe transition joint in the kitchen sink. Wipe the greasy metal spike with a soapy sponge immediately after cooking. Rinse the sponge clean and wipe away the leftover soap residue. Dry the metal components thoroughly with a thick paper towel before putting the device away in your cabinets.
Coil the braided cable loosely like a standard garden hose. Wrapping the wire tightly around the plastic base station puts immense stress on the internal copper filaments and causes them to snap. Store the unit safely in a designated kitchen drawer away from sharp knives that might slice the protective silicone coating. Treat this tool like a sensitive electronic device rather than a heavy piece of cast iron cookware.
Quick Tips
- Insert the probe into the thickest part of a whole turkey thigh parallel to the body cavity to dodge the hip bone.
- Buy a unit with dual probes so you can track the internal temperature of your meat and the ambient temperature of your oven simultaneously.
- Keep replacement batteries in your kitchen drawer because a dead base station halfway through a four-hour braise will ruin your timing.
- Wipe down the braided cable with a damp cloth soaked in white vinegar to strip away sticky polymerized grease after roasting pork belly.
- Pre-poke a small hole with a pairing knife through the tough skin of a pork shoulder before inserting the probe to prevent bending the metal tip.
Frequently Asked Questions
A probe thermometer takes the stress entirely out of roasting large cuts of meat. You set your target temperature and walk away to prepare side dishes while the base station monitors the heat. Getting the tip perfectly centered in the thickest part of the muscle guarantees you hit exactly 135 degrees for a medium-rare roast beef.
Grab your thermometer and test it in a glass of ice water today. Verify that it reads an exact 32 degrees before you trust it with an expensive holiday turkey. Insert the metal spike through the side of your next roast, set your alarm five degrees early to account for carryover cooking, and enjoy perfectly cooked food.
Recommended Products
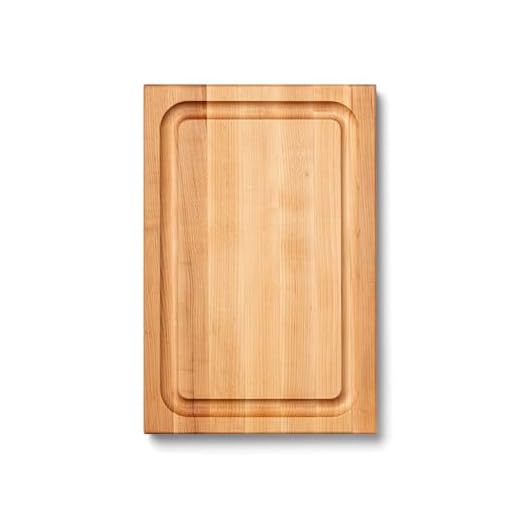
John Boos Maple Wood Cutting Board (18×12-inch)