You just unpacked a heavy stainless steel cylinder with a dozen buttons, a locked lid, and a pressure release valve that looks slightly intimidating. The manual reads like a stereo schematic. You want a quick weeknight dinner, not an engineering degree. Most people leave their new multi-cooker in the box for months out of fear. You can avoid that trap by learning exactly how this machine builds and releases pressure.
The magic happens when water boils inside a sealed environment. Steam cannot escape. The trapped steam builds pressure, which raises the boiling point of water from 212 degrees Fahrenheit to about 250 degrees. Your food cooks significantly faster at this higher temperature. A tough chuck roast that normally takes four hours in the oven becomes fall-apart tender in 45 minutes. Hard-boiled eggs peel perfectly after just five minutes of high pressure.
You just need to master the basic sequence. You will lock the lid, set the cooking time, wait for the machine to pressurize, let it cook, and then release the steam. We will walk through the exact water test you should do right now to build your confidence.
Run the Initial Water Test to Build Your Confidence
Your first run should not involve expensive meat. You need to perform the standard water test to see exactly how the machine sounds, steams, and seals. Pour three cups of cold water directly into the stainless steel inner pot. Lock the lid into place. You will hear a musical chime when the lid seats correctly. Turn the steam release valve on the top of the lid to the Sealing position. This traps the steam inside the pot.
Press the Pressure Cook or Manual button. Use the plus or minus buttons to set the time to five minutes. The display will say On while the machine heats the water. This heating phase takes about ten minutes. The silver float valve will pop up, sealing the pot completely. The timer will then count down from five. Once it hits zero, carefully turn the release valve to Venting using a wooden spoon handle. The steam will shoot up loudly.
Choose Between Quick Release and Natural Release
Your recipe will specify either a Quick Release or a Natural Release. A Quick Release means you manually turn the valve from Sealing to Venting the second the cooking timer beeps. Steam forcefully escapes for two to three minutes. You use this method for delicate foods that overcook easily. Vegetables, pasta, and shrimp require a Quick Release to stop the cooking process immediately. Keep your face and hands clear of the steam jet.
A Natural Release requires patience. You simply do nothing when the timer goes off. The machine switches to Keep Warm mode. The internal pressure drops slowly as the temperature decreases. This takes anywhere from 15 to 30 minutes depending on how full the pot is. You must use Natural Release for tough cuts of meat, soups, and starchy foods like oatmeal. If you use Quick Release on a full pot of soup, boiling liquid will spray through the valve.
Brown Your Meat Using the Sauté Function
Pressure cooking alone does not brown food. A roast cooked entirely under pressure will look gray and lack depth of flavor. You can build incredible flavor by browning your meat directly in the pot before sealing the lid. Press the Sauté button and wait about three minutes until the display reads Hot. Add two tablespoons of olive oil. Sear your beef chunks or chicken thighs for four minutes per side until deeply browned.
You must scrape the bottom of the pot after sautéing. This is non-negotiable. Add half a cup of chicken broth or water to the hot pot. Use a wooden spatula to scrape up every single browned bit stuck to the stainless steel bottom. If you leave food stuck to the bottom, the machine’s sensors will trigger a Burn error during the pressure cycle and shut off the heat. Your liquid must touch bare metal.
Add the Right Amount of Thin Liquid Every Time
An Instant Pot cannot build pressure without steam. Steam only comes from thin, watery liquids. You need a minimum of one cup of thin liquid for the six-quart model and one and a half cups for the eight-quart model. Water, chicken broth, beef stock, and apple juice all work perfectly. If you do not add enough liquid, the pot will simply heat up, scorch your food, and flash the dreaded burn warning.
Thick sauces do not count toward your liquid requirement. Tomato paste, canned cream soups, and thick barbecue sauce will not boil rapidly enough to create steam. They just burn to the bottom of the inner pot. You should always layer thick sauces on top of your other ingredients. Pour your required cup of broth on the bottom. Add your meat. Spoon your thick sauce over the meat and do not stir. The machine will pressurize using the broth below.
Ignore the Pre-Programmed Buttons on the Display
The front of your machine features buttons for Soup, Meat, Rice, and Poultry. These presets are just suggested cooking times disguised as smart features. Pressing the Meat button does not trigger a special meat-cooking sequence. It simply cooks at high pressure for 35 minutes. You will get much better, more consistent results by manually entering the time required by your specific recipe. Different cuts of meat require vastly different cooking times.
You only need to use three buttons on the entire control panel. You need Pressure Cook to start a cycle under pressure. You need Sauté to brown ingredients before pressure cooking. You need Cancel to stop any cooking program or turn off the Keep Warm feature. Stick to these three controls. Manually set your times using the plus and minus keys. You will have total control over your food and avoid overcooked, mushy dinners.
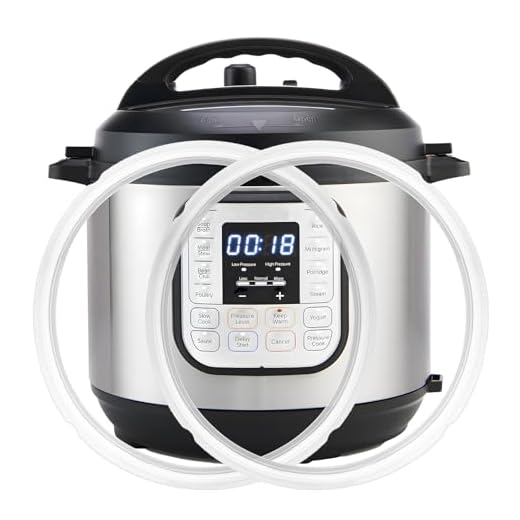
Wash the Silicone Sealing Ring After Every Use
The clear silicone ring tucked inside the lid creates the airtight seal necessary for pressure cooking. This ring absorbs strong odors like a sponge. If you cook a batch of spicy chili on Tuesday, the ring will smell like cumin and garlic all week. You must pull the ring out of the wire rack inside the lid and wash it with hot, soapy water after every single use. Let it air dry completely before reinstalling it.
You should buy a second sealing ring right away. Use one ring exclusively for savory dishes like stews and curries. Keep the second ring strictly for sweet dishes like cheesecake, oatmeal, or applesauce. You do not want your vanilla yogurt tasting like yesterday’s pot roast. Inspect the ring monthly for cracks or stretching. The machine will fail to pressurize if the ring becomes deformed. Replace the silicone ring every 12 to 18 months.
Use the Trivet to Keep Food Out of the Liquid
Your cooker came with a metal wire rack with folding legs. This trivet is a highly useful tool, not a packing insert. You use it to elevate food above the boiling liquid at the bottom of the pot. When you cook a whole chicken, you want it to steam, not boil in its own juices. Place the trivet in the pot, pour in your cup of water, and rest the chicken directly on the wire rack.
The trivet also lets you cook multiple items at once using the pot-in-pot method. You can place a mixture of meat and sauce in the main pot. You then set the tall trivet over the meat. Place a stainless steel bowl filled with rice and water on top of the trivet. The steam from the meat cooks the rice simultaneously. Always use a bowl made of oven-safe glass or food-grade stainless steel for this method.
Quick Tips
- Always check that the silicone ring is seated firmly against the wire rack inside the lid before closing it.
- Keep the machine pulled out from under your upper kitchen cabinets when releasing steam to prevent moisture damage to your woodwork.
- Never fill the inner pot past the two-thirds maximum line when cooking normal food, or the halfway line when cooking expanding foods like rice.
- Store the lid upside down on the base when not in use to let the silicone ring air out and prevent musty odors.
- Use a wooden spoon handle to push the steam release valve so you keep your hands far away from the hot vapor.
Frequently Asked Questions
Cooking under pressure feels strange at first. You give up the ability to watch your food simmer and trust the machine to do the work behind a locked lid. Start with the basic water test to understand the sounds and functions. Move on to a simple batch of hard-boiled eggs or white rice. Once you understand how thin liquids generate steam and how the release valve works, you can adapt almost any standard recipe for pressure cooking.
Stop letting that appliance sit unused in your pantry. Pull it out, wash the inner pot, and run the five-minute water test today. You will quickly see how much time you save on weeknight dinners once you master the basic controls.
Recommended Products

Instant Pot Duo 7-in-1 (6-Quart)


